Tamagotchi for Hackers: Building a Pwnagotchi
If you grew up in the late ’90s or early 2000s, chances are you remember Tamagotchis—the small handheld digital pets from Bandai that demanded constant attention through feeding, games, and care via three tiny buttons.
Recently, I stumbled across a fantastic open-source project called Pwnagotchi.
As the name suggests, it’s a playful nod to Tamagotchis—but with a cybersecurity twist. Instead of feeding a digital pet, you’re training a small device to passively observe and learn from Wi-Fi environments.
As someone with a background in cybersecurity and a growing interest in electronics, this felt like the perfect project to take on.

What Is a Pwnagotchi?
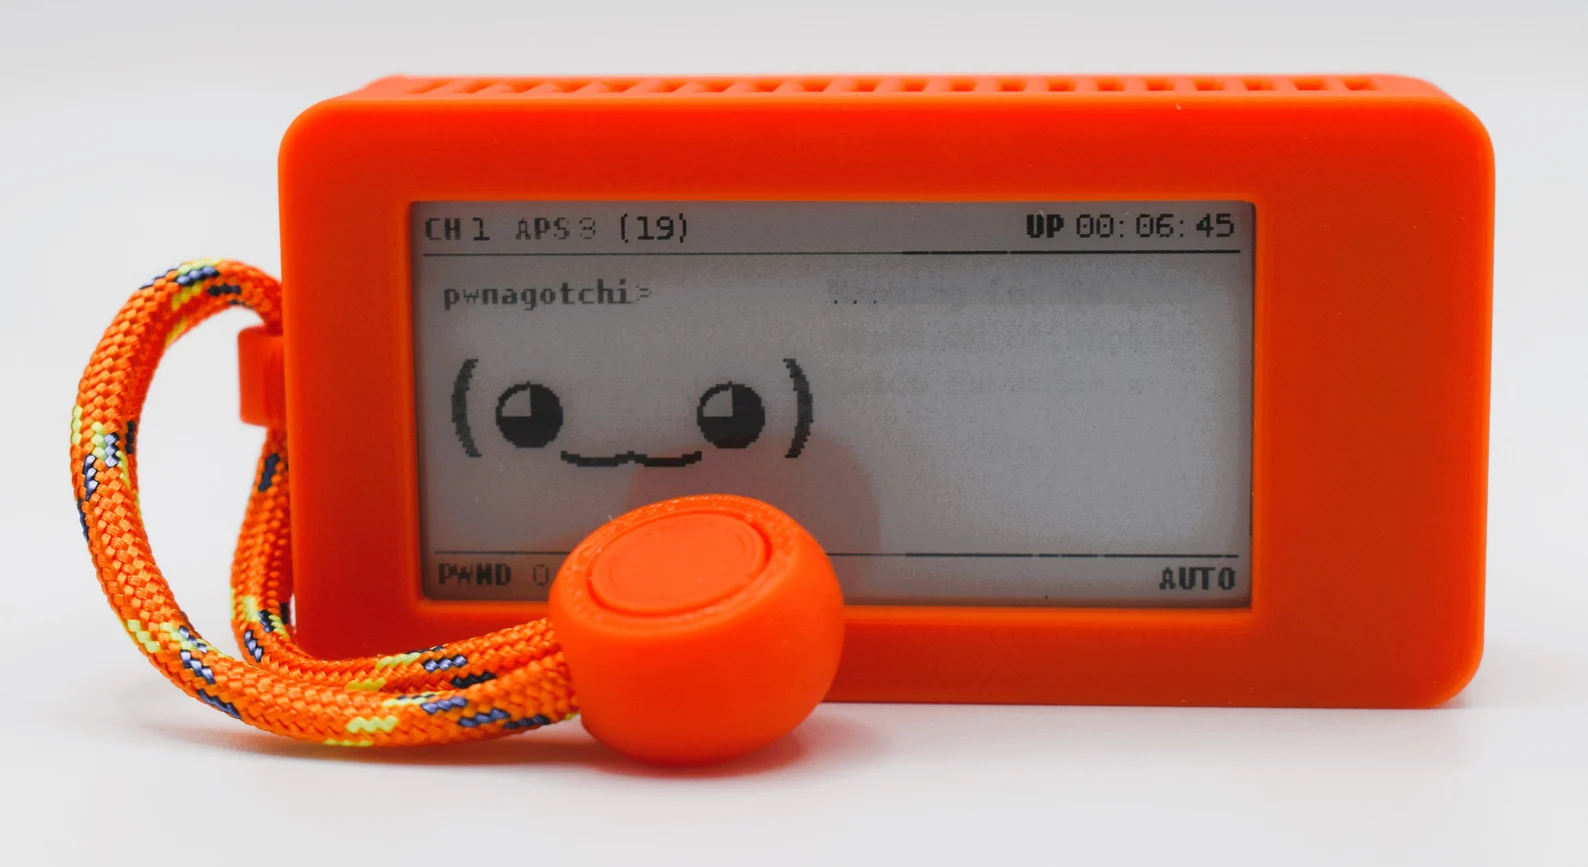
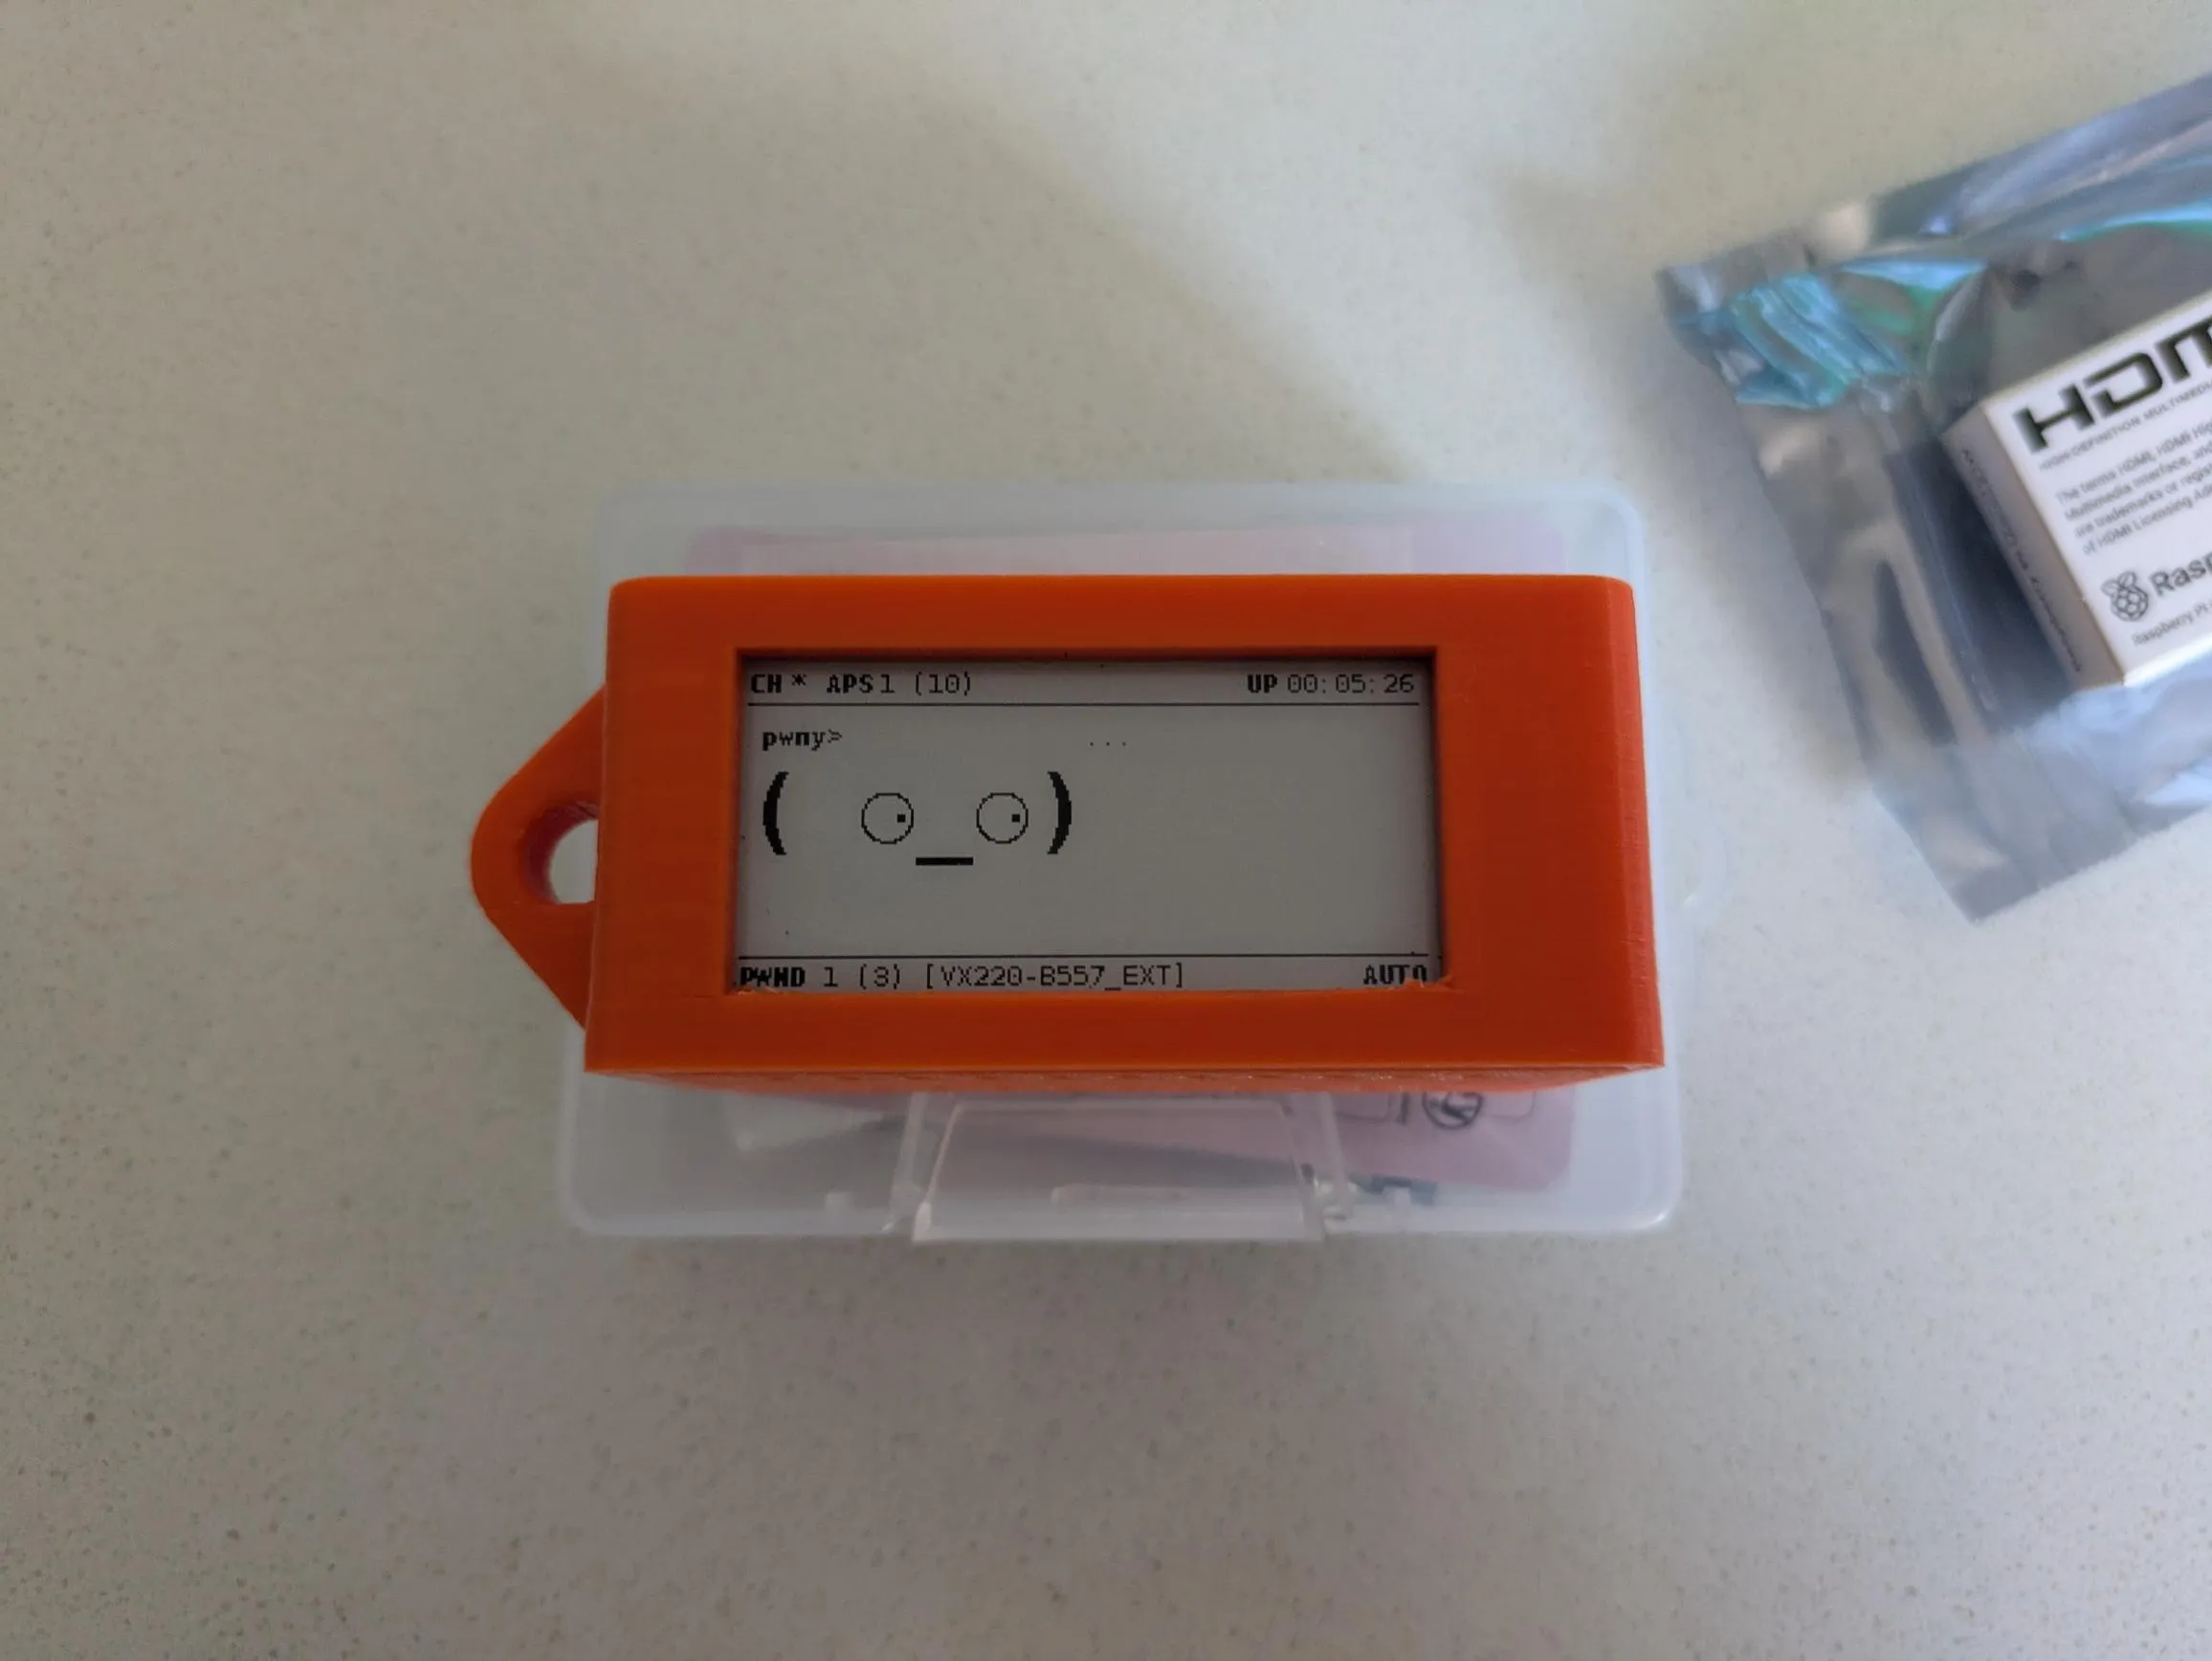
A Pwnagotchi is a DIY, battery-powered device built around a Raspberry Pi. It uses bettercap under the hood to monitor Wi-Fi traffic and capture handshakes, all while displaying a charming “face” that evolves based on its activity.
The project is surprisingly beginner-friendly. With some basic Linux and Raspberry Pi knowledge, you can get one up and running without soldering or advanced electronics experience.
Hardware Selection
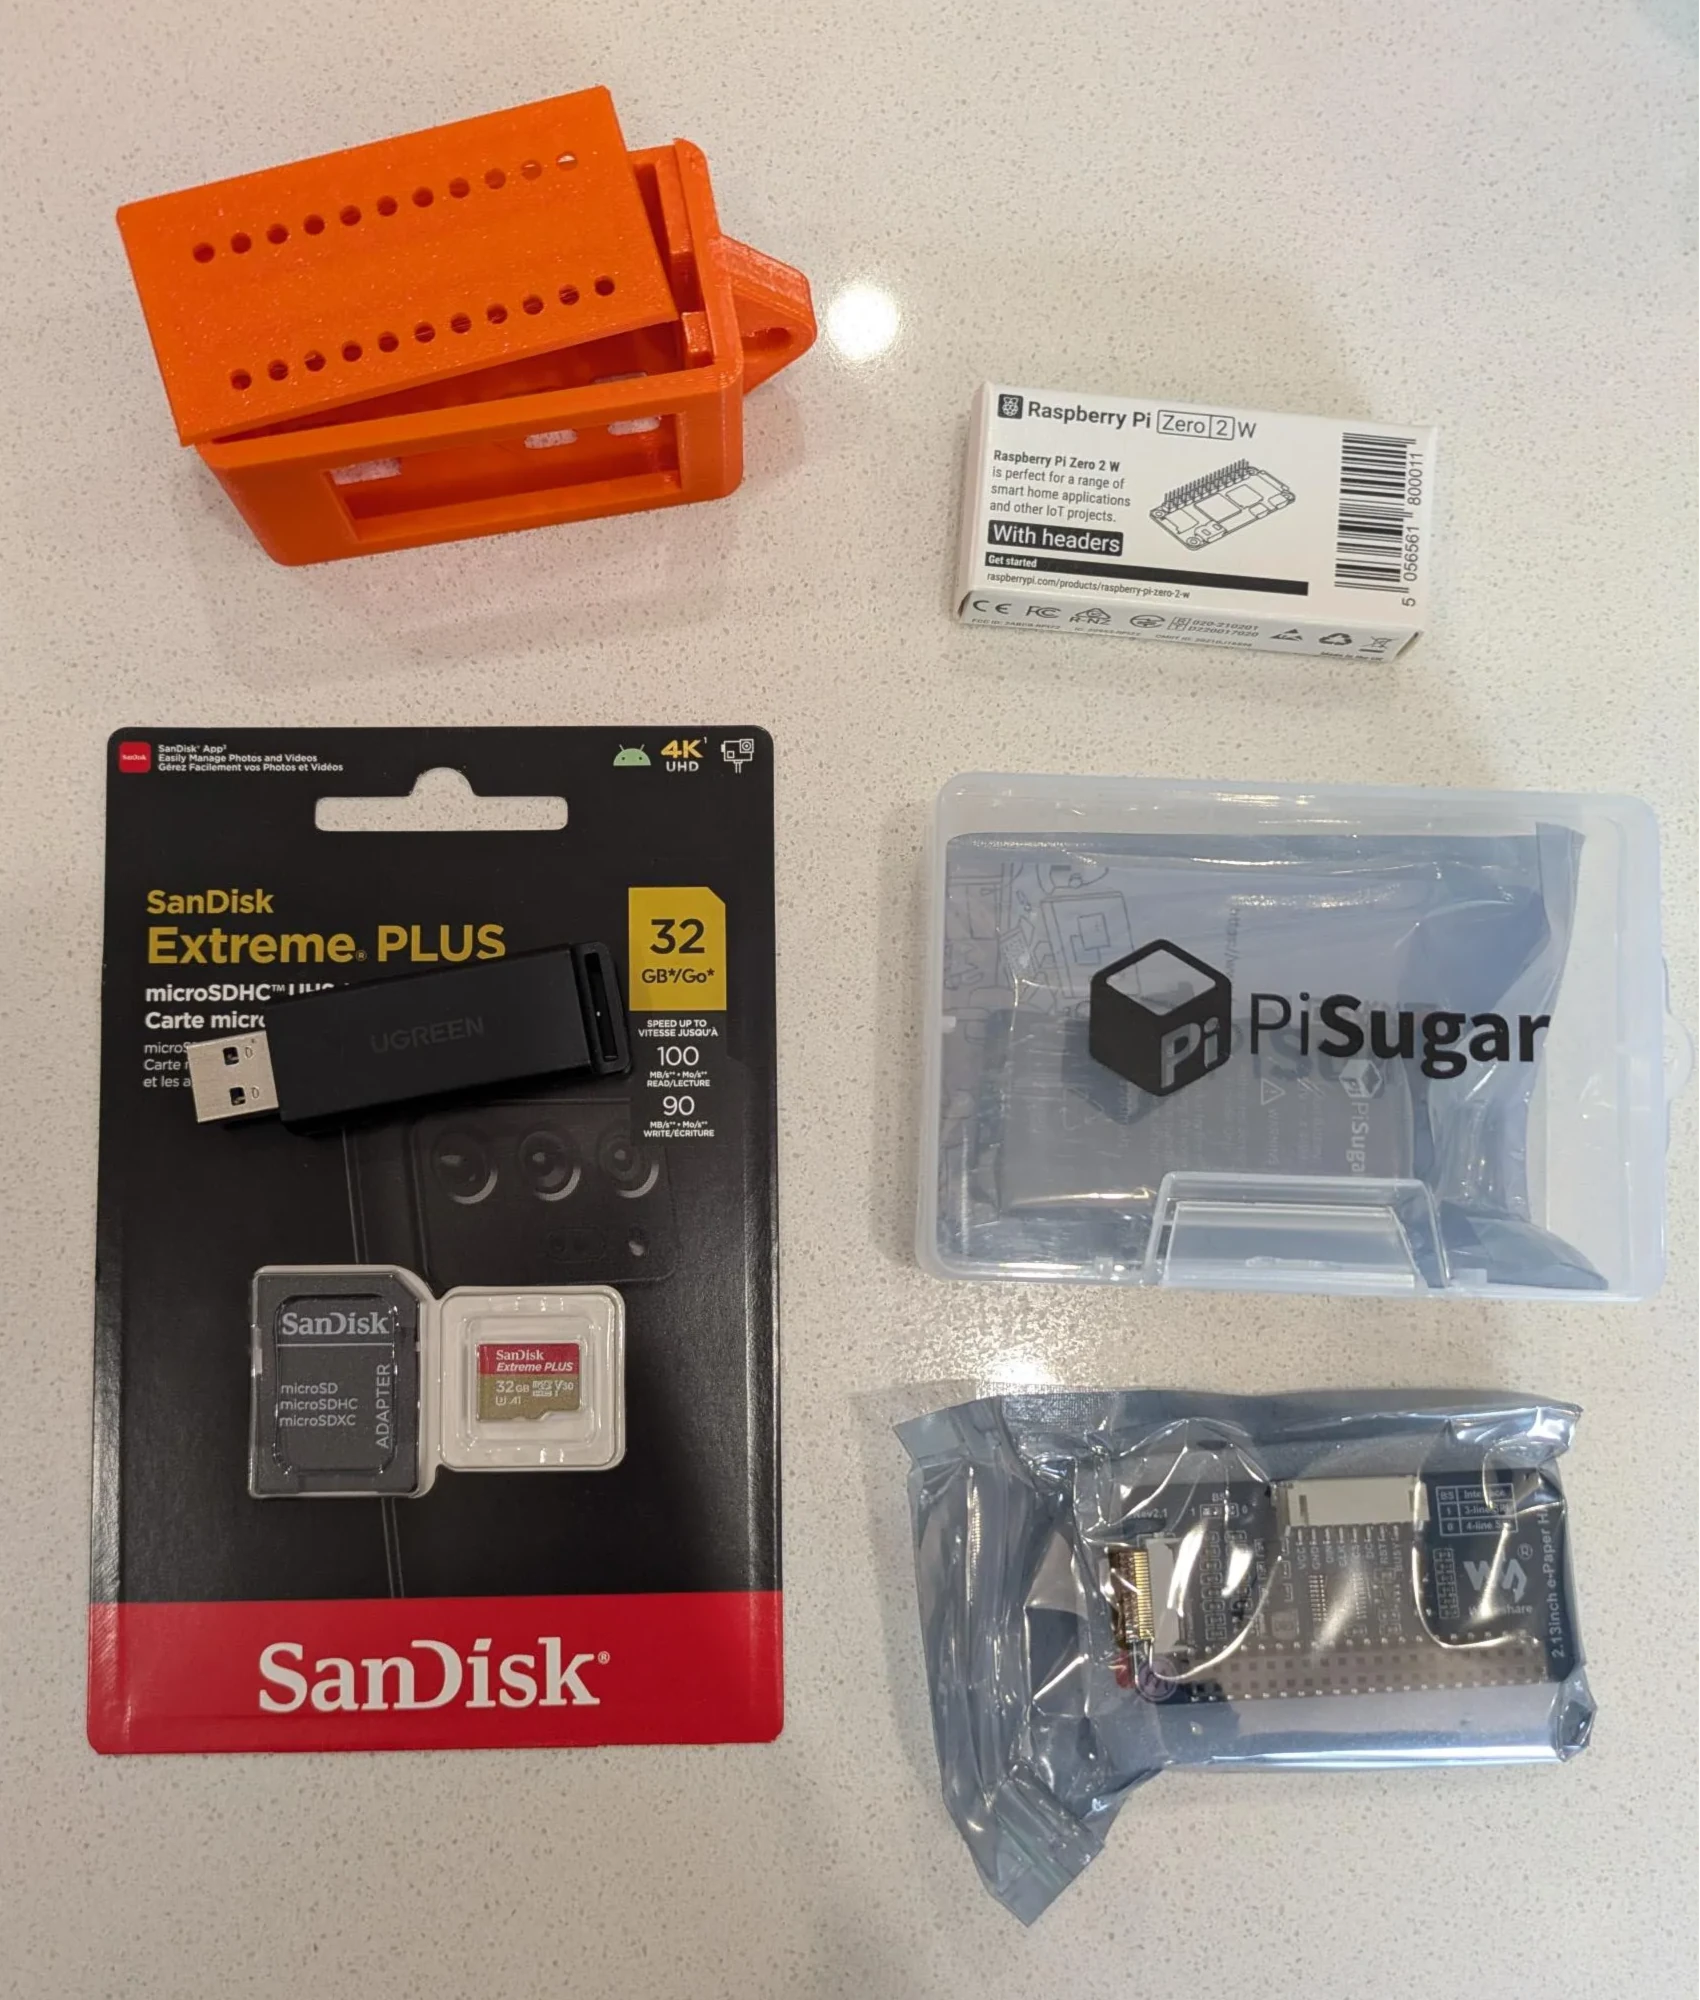
After some research, I settled on a portable configuration featuring an e-ink display and internal battery. This keeps power consumption low and gives the device a very authentic Tamagotchi-like feel.
Parts List
Here’s the hardware I used for my build:
-
Raspberry Pi Zero 2 W (with header pins)
-
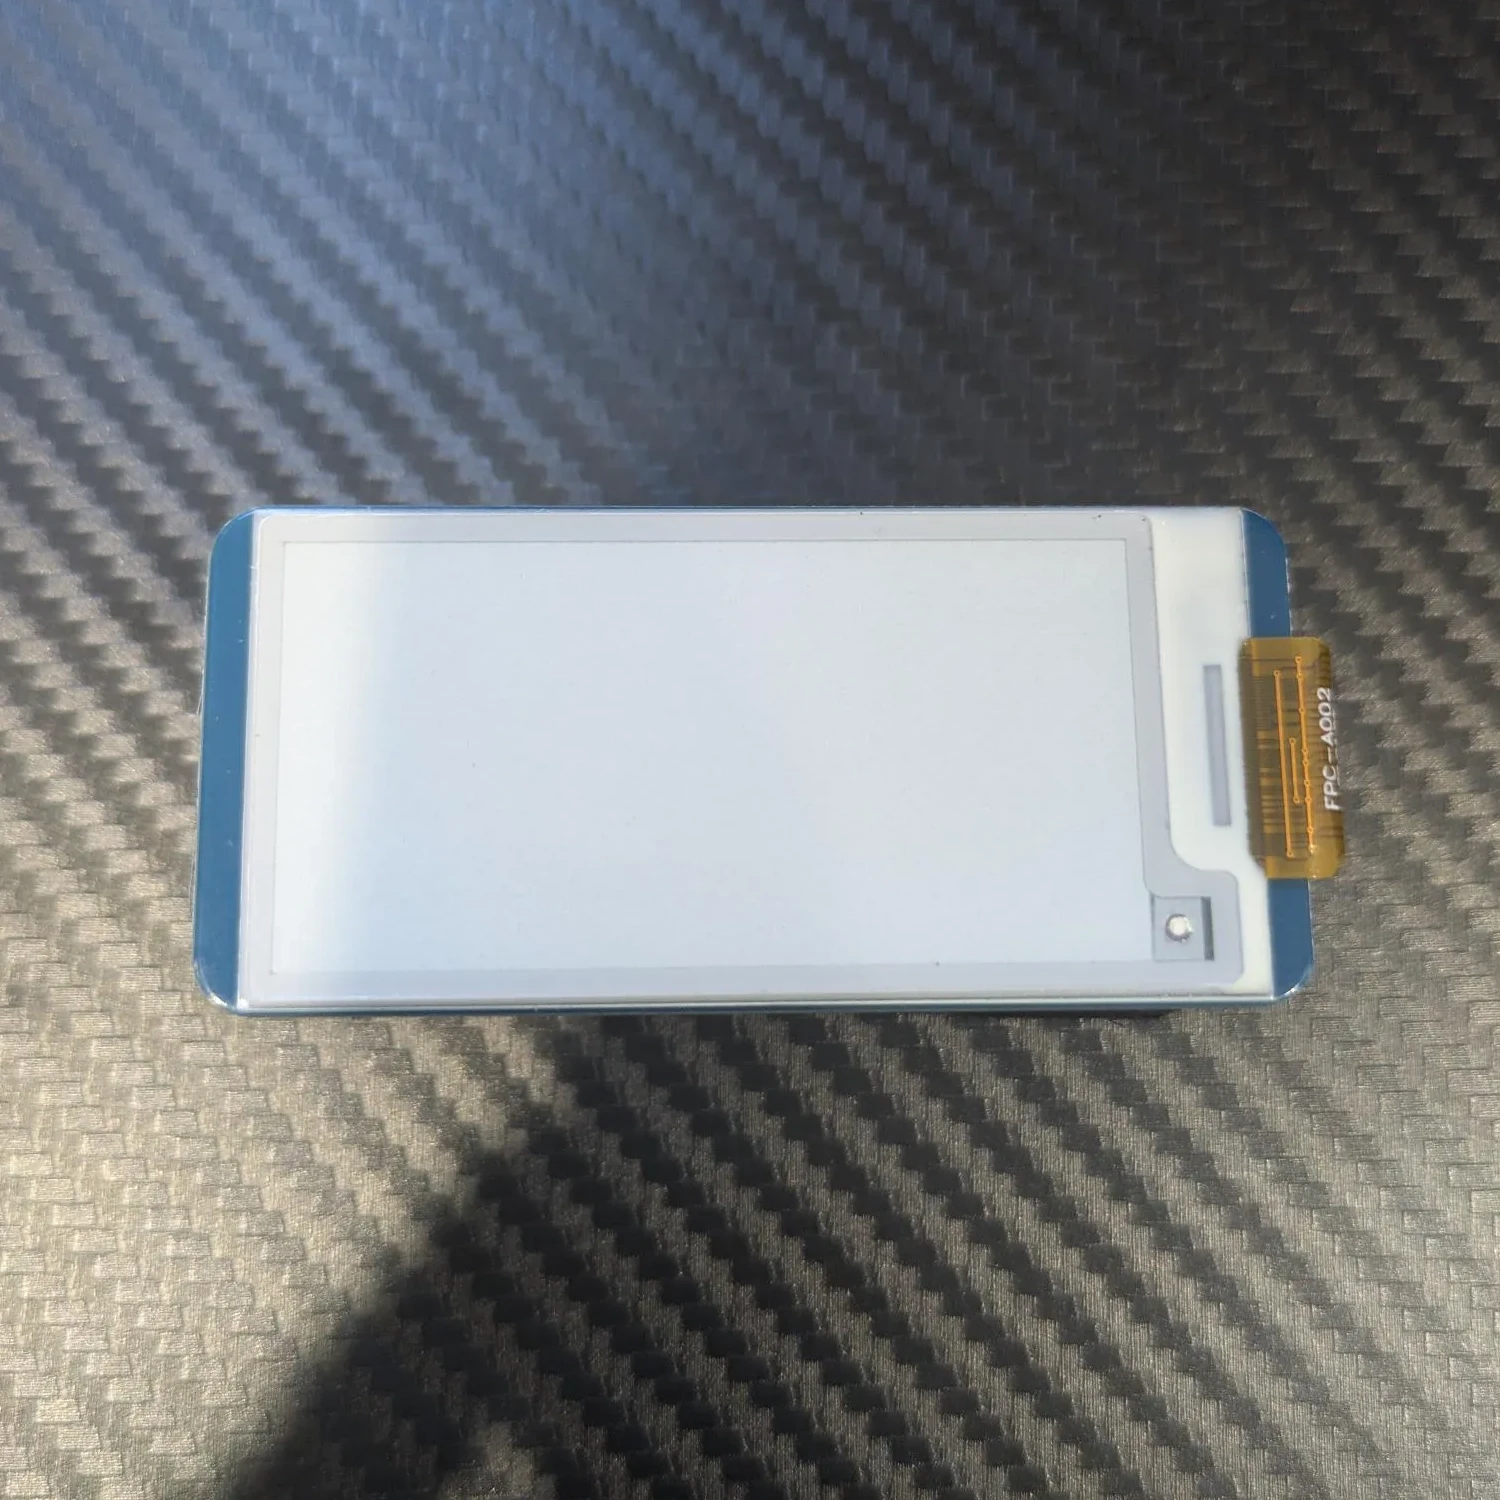
Waveshare v4 2.13” E-Ink Display HAT
-
PiSugar 3 (1200mAh) Battery
-
32GB MicroSD Card (plus USB adapter or card reader)
-
Micro-USB to USB-A Cable
-
3D-Printed Case
The case isn’t strictly necessary, but since I already own an FDM 3D printer, it was an easy decision.
Assembly
One of the biggest advantages of this build is that it’s completely solderless:
-
The Waveshare e-ink display slots directly onto the Raspberry Pi header pins.
-
The PiSugar battery mounts to the back of the Pi using four screws.
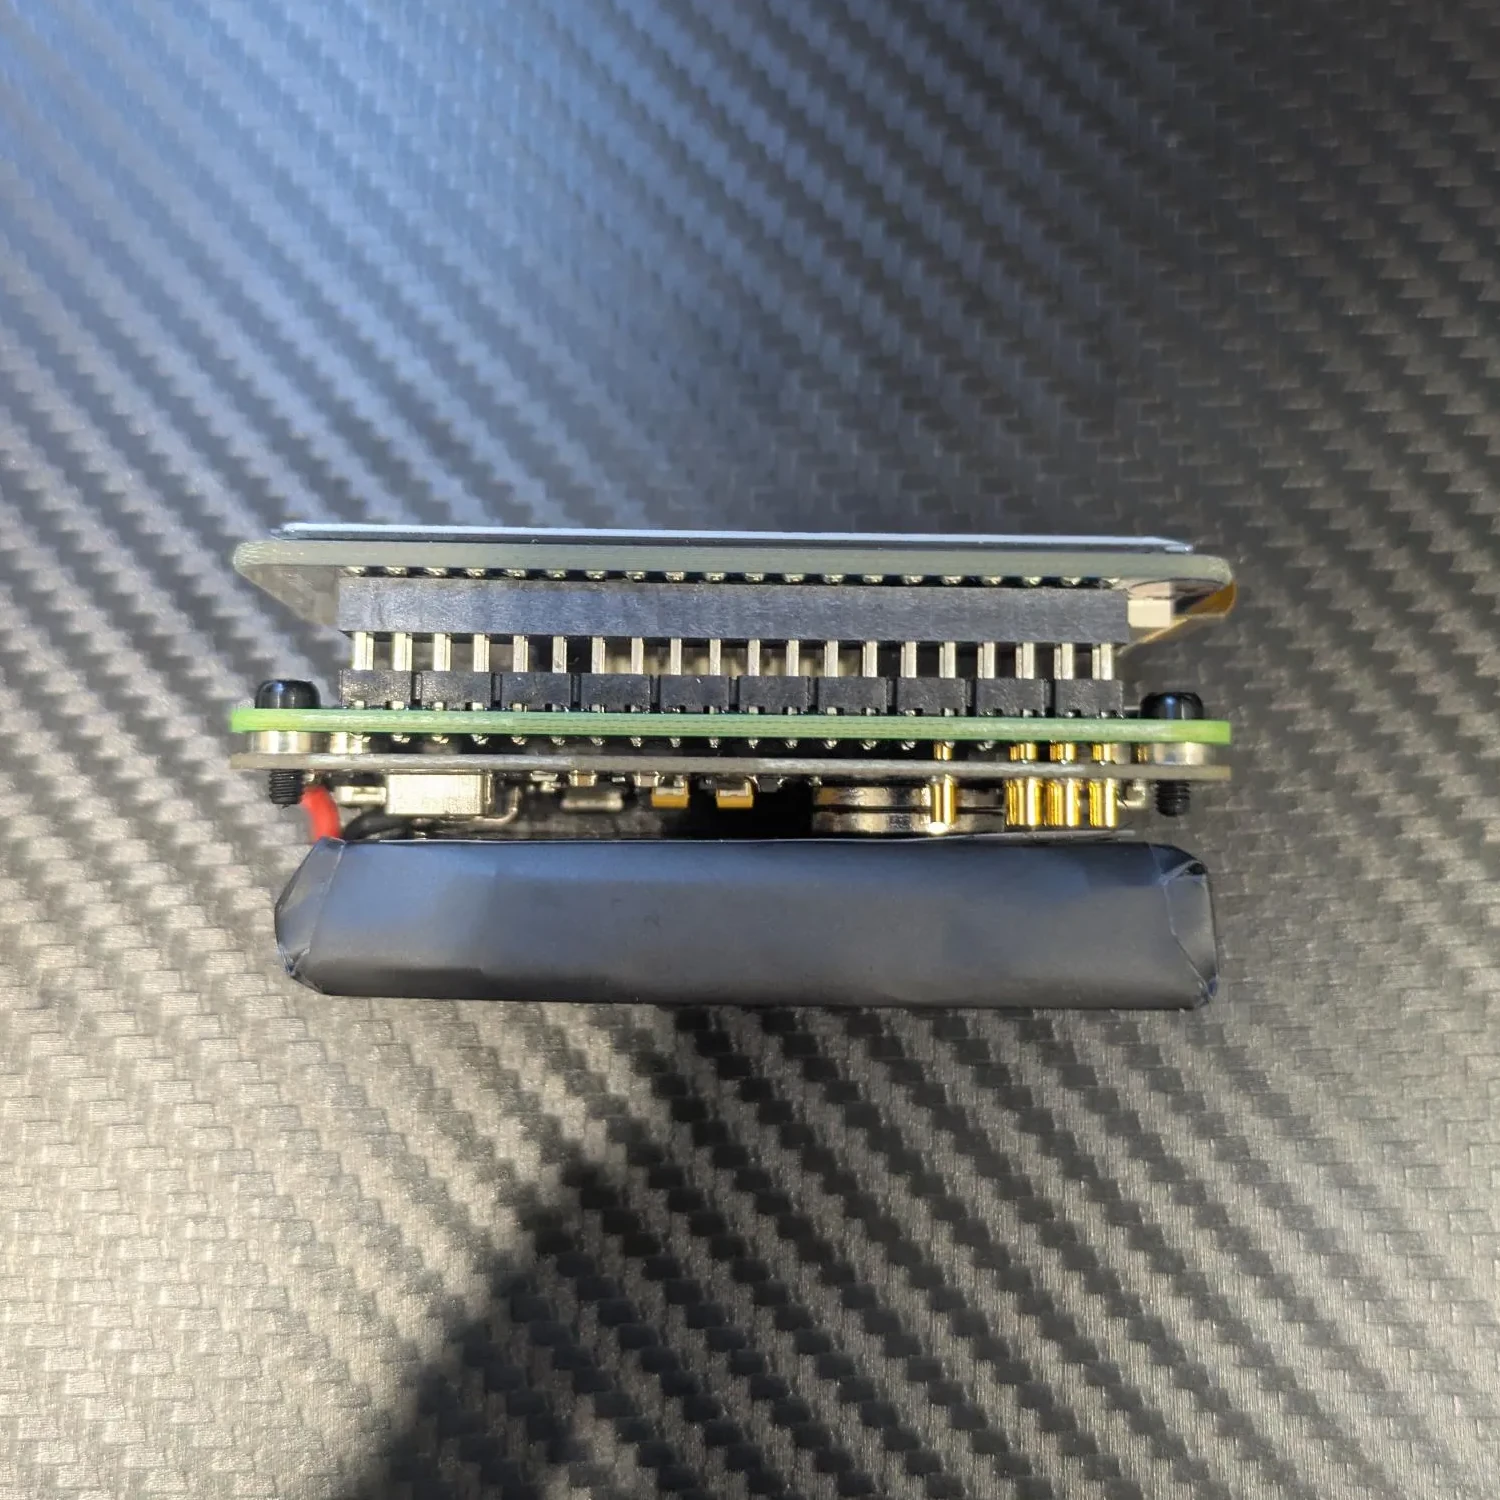
The entire assembly process took only a few minutes.
Software Installation
Rather than repeating everything in the documentation here, I’ll link the guide I followed:
Installation involves flashing a custom Pwnagotchi image to the microSD card using Raspberry Pi Imager, inserting it into the device, and connecting the Pi to your computer via USB.

Initial Setup (Windows)
I completed the setup on a Windows laptop:
-
Installed the RNDIS driver so Windows could recognize the Pwnagotchi as a USB Ethernet device.
-
Assigned a static IP address as recommended in the guide.
-
Connected via SSH and immediately changed the default password (highly recommended).
Initial configuration is handled via an interactive wizard:
sudo pwnagotchi --wizard
Once complete, the device is technically ready—b Below are the key settings I recommend enabling or modifying:
ut a few important security and usability settings should be configured first.
Web UI and Configuration
The main configuration file lives at:
/etc/pwnagotchi/config.toml
While this can be edited manually, the web UI provides a much more user-friendly experience.
Enabling the Web UI
With the device connected to your PC, navigate to:
http://10.0.0.2:8080
Once inside the web UI:
-
Go to Plugins
-
Enable the webcfg plugin
From here, all configuration can be handled through the browser.
Recommended Configuration Settings
Below are the key settings I recommend enabling or modifying:
# Opt out of PwnGrid data sharing
main.plugins.grid.enabled = false
main.plugins.grid.report = false

# Disable deauthentication packets
personality.deauth = false

# Enable and secure the web UI
ui.web.enabled = true
ui.web.auth = true
ui.web.username = "USERNAME"
ui.web.password = "PASSWORD"
Disabling deauthentication is especially important to avoid disrupting nearby networks and potential legal issues.
Securing Bettercap
Pwnagotchi relies on bettercap for packet capture and analysis. bettercap has its own web interface, accessible at:
http://pwnagotchi.local
(Default credentials: pwnagotchi / pwnagotchi)
Changing the Bettercap Credentials
-
SSH into the Pwnagotchi
- Edit:
/usr/local/share/bettercap/caplets/pwnagotchi-auto.capUpdate:
set api.rest.username "USERNAME" set api.rest.password "PASSWORD" - Edit:
/etc/pwnagotchi/config.tomlUpdate:
bettercap.username = "USERNAME" bettercap.password = "PASSWORD" - Reboot:
sudo reboot
⚠️ Note: These credentials are stored in plain text. Do not reuse sensitive passwords.
Testing the Device
After rebooting, I unplugged the device and tested it on my home network. The Pwnagotchi successfully captured a handshake, which was clearly indicated on the display.
Handshake files can be found at:
/home/pi/handshakes
While my Wi-Fi password proved too strong to crack (as it should), the device worked exactly as intended.
Final Thoughts
The Pwnagotchi is a fun, educational project that blends nostalgia with practical cybersecurity concepts. It’s an excellent way to learn more about wireless security, Linux, and embedded devices.
If you’re interested in hardware hacking, wireless security, or just enjoy nostalgic tech projects, building a Pwnagotchi is absolutely worth your time.